3 DIY Halloween Crafts for Candle Lovers
* Disclaimer * I am an Amazon Associate. This post contains Amazon affiliate links. If you use them, I earn from qualifying purchases a commission of the sale at no additional cost to you.
I love the autumn season.
Autumn brings crisp fresh weather, colorful leaves, and HALLOWEEN!!
When I was a kid, my sisters and I made our costumes. In fact, everyone I knew made their costumes. It was great! There were no two costumes the same.
Creating our costumes enhanced our creativity and resurrected my creative bug every Halloween season!
Below are 3 candle DIY crafts for Halloween.
I have listed the projects from what I considered the easiest to the more difficult. Click the photo to jump to the project you’d like to create.

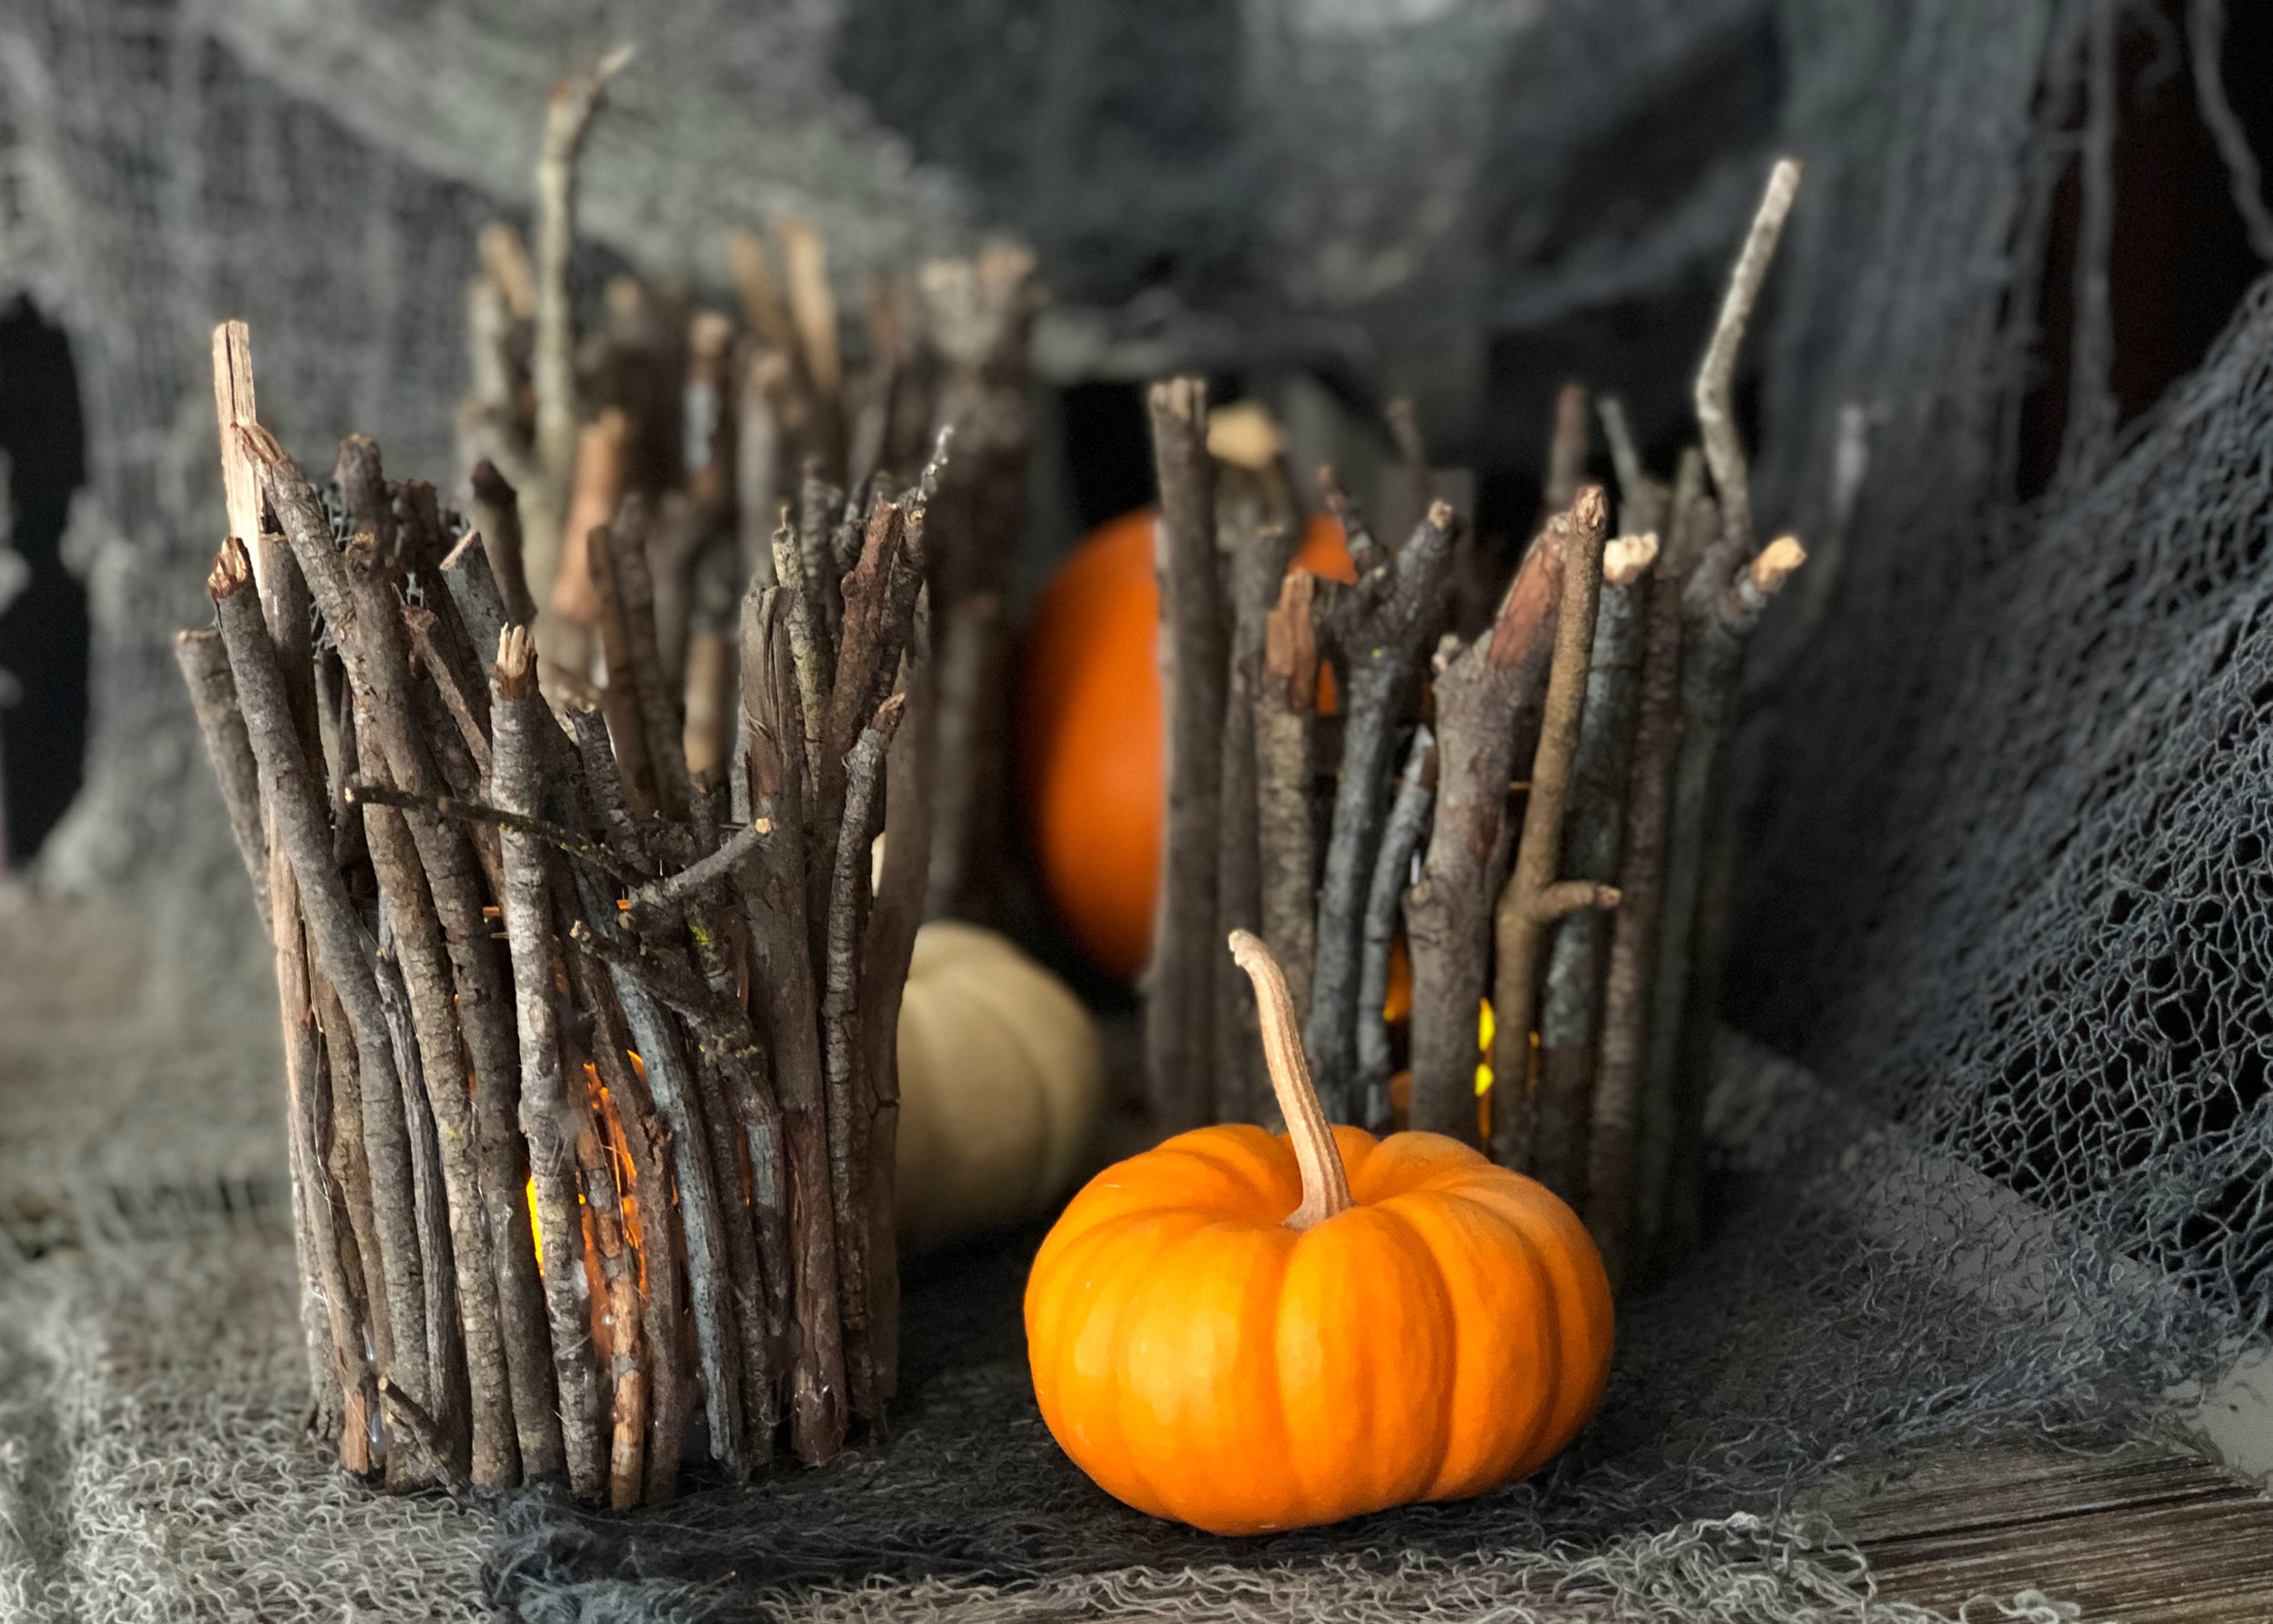
Spooky Stick Candle Holder
Easy project and uses natural elements.

Image Transfer
On Candles
This technique can be used for all sorts of occasions!

Creepy Glowing Eye Candle Holders
* Warning * - This project is not for the faint of heart.
Spooky Stick Candle Holder Project
Fist up is the super simple spooky stick candle holder project!
all you need are:
Sticks - found in nature or on *Amazon
(Seriously, is there anything NOT on Amazon )

Step 1.
Spend time in nature. Take a walk and collect some sticks.

Step 2.
Cut the sticks down to the size of the candle holder you are using. I made mine an inch longer than my candle holder and staggered the sizes every now and then to make a more rough and organic look.

Step 3.
Hot glue sticks to the class candle holder
And that’s how you make the super simple spooky stick candle holder project.
It’s as easy as 1-2-3!
Return to top ↑
Image Transfers Onto A Candles
This project is my favorite!
Now that I know how to do this technique, it got me to thinking of all the ways I can use it. This craft would be perfect to make for housewarming, Christmas, and Easter gifts!
For this project you will need:
Images that you want to transfer
Follow These Steps!
Find an image(s) you want to transfer. Save them to your computer and then upload the saved images to a document that can be printed on printer paper.

2.Print
• Cut tissue paper to the size of printer paper.
• Securely affix the tissue paper (shiny side up) to a sheet of printer paper. I used scotch tape on both ends of the printer paper.
• Place paper with the affixed tissue paper on the paper tray to be the next to be printed on.

3. Color
• Allow the ink to dry on tissue paper
• Leave the graphic you printed affixed to printer paper and then carefully color to graphic with colored pencils as not to tear the tissue paper. I recommend soft leaded pencils for this project.

4. Cut out image
• After your graphics are colored, cut out the graphic, discard printer paper, and place the colored side of the tissue paper down on the candle.
• Cut out some wax paper to place on top of the graphic
• Carefully hold the graphic where you would like it to be affixed

5. Melt together
• Use the heat gun to carefully seal the tissue paper onto the candle.
• Be careful not to leave the heat gun in one spot for too long as it will melt the candle in a that spot. Move the heat gun quickly and evenly around the graphic to ensure it is fully adhered to the candle.

Mess Up
I recommend uncoated plain wax candles.
The bigger candles I used in this project had a shiny coating to them. This coating made it difficult for the wax paper to melt the graphic onto the candle. As shown in the photo I used the heat gun in one place too long trying to get the graphic to seal. I smoothed out the messy wax, but I still looked a little wonky. 😐
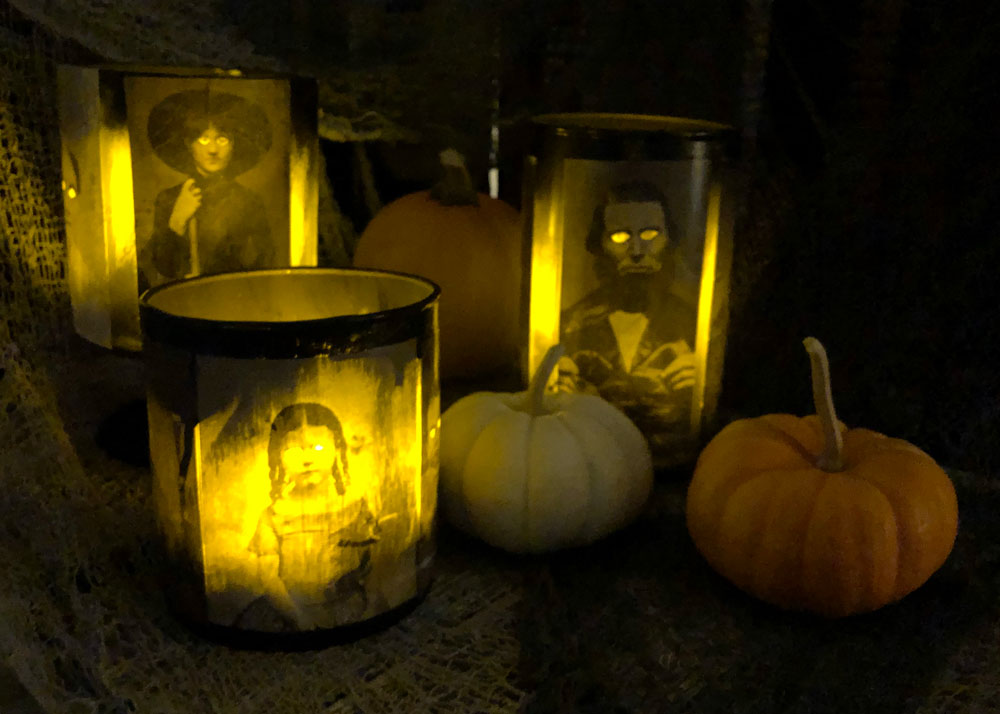
Creepy Glowing Eye Candle Holders
This project is not in the “oh, isn’t that cute” category. This is definitely a “Oh,My Goodness, that’s creepy” category.
For This Creepy Project You Will Need:
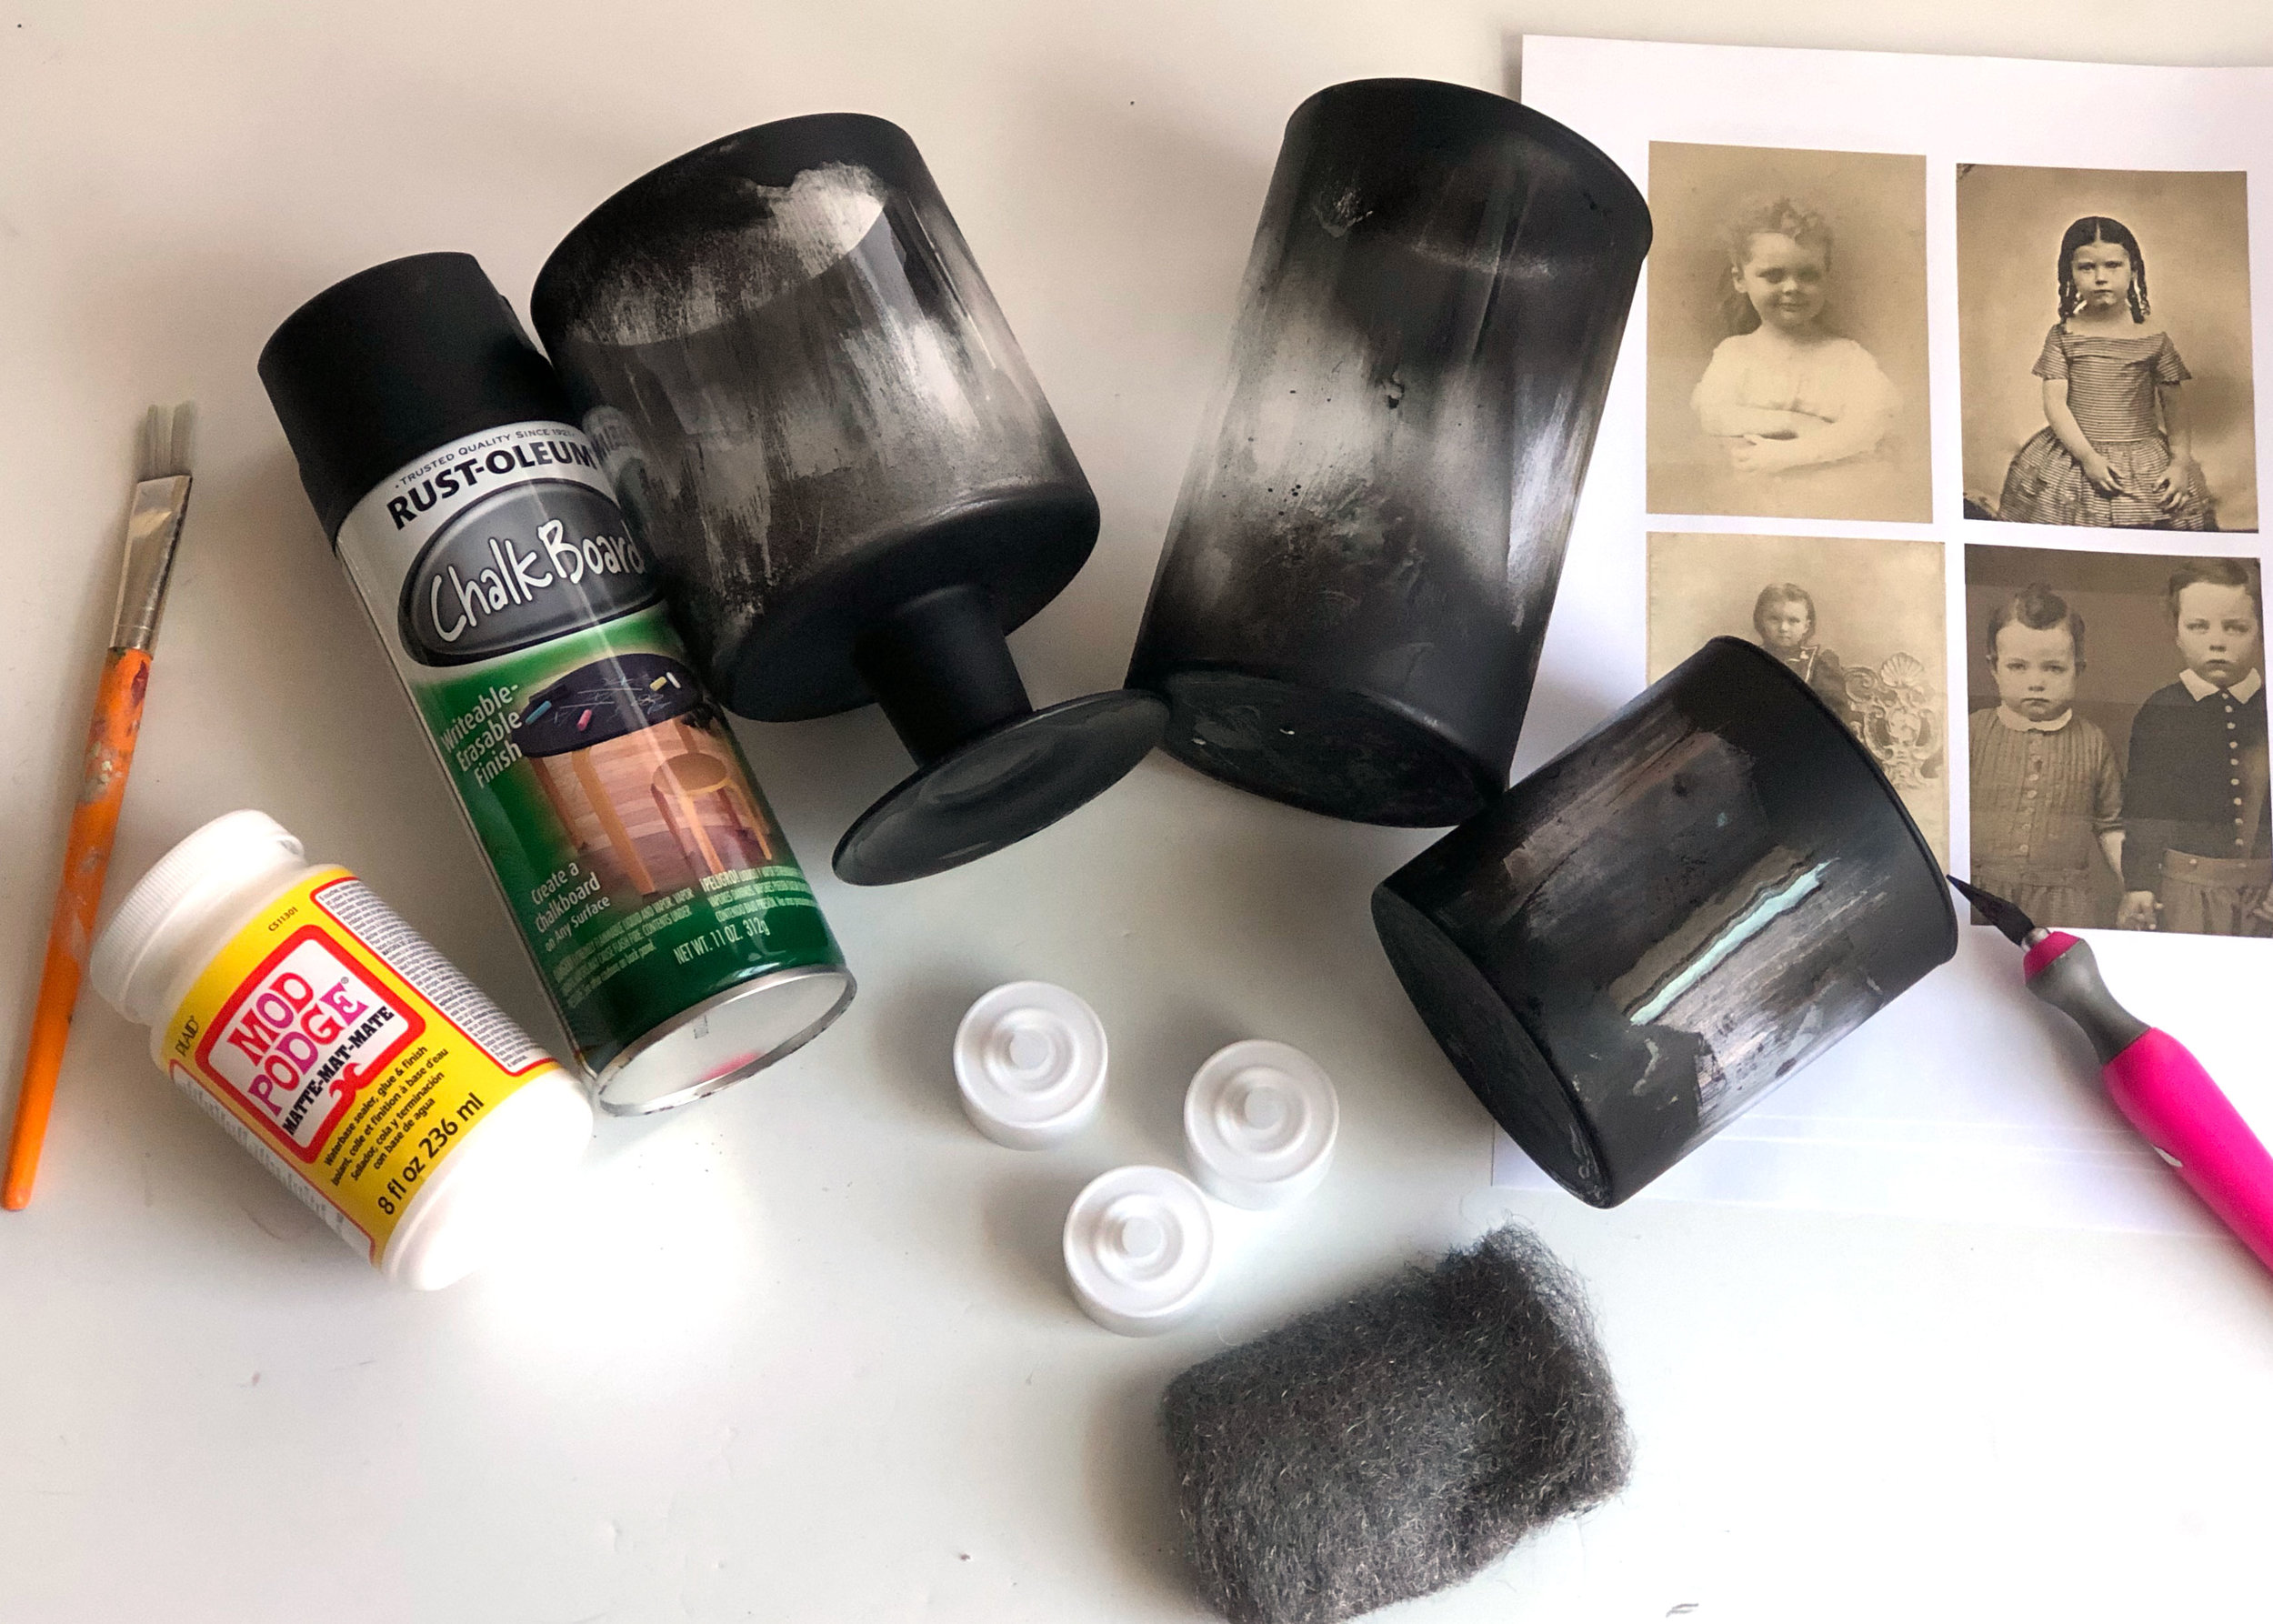
Your Home Printer
old towel to wipe up some wet paint

1. Spray Paint
• Spay paint the tops and bottom of each candle holder.. some drippage and over spray is a good thing in this project.
• Allow to dry
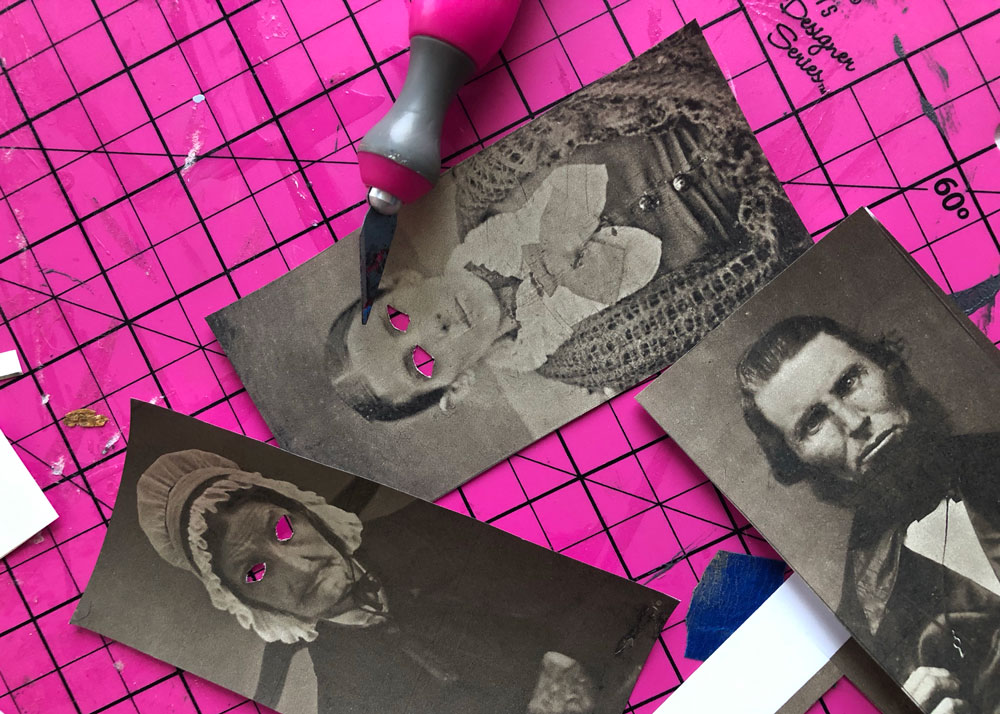
2. Print + Cut
• Print old photos to desired size and cut out eyes with an X-Acto knife.
• Position on to the candle holder making sure that the eyes are clear from spray paint. If there is some spay paint covering the eyes use the steel wool to scrape away.
• Glue photo onto glass candle holder with Mod Podge
• After the photos are attached, seal the photos with more Mod Podge and allow to dry
These projects were a lot of fun to create and I’m pretty happy with the way they turned out.
Happy Halloween, everyone!!