
DIY Scented Candles For Fall
Intro

I stumbled on these microwaveable soy candle flakes at Michaels and decided to give it a try.
This kit was super easy to use, especially because it comes in a plastic container that can melt the wax flakes.
Once I got this home, I decided to make some autumn-themed candles.
I used some orange, brown, and gold-colored crayons to color the wax. I also used some spices like cinnamon, cloves, and pumpkin spice to add an autumn scent.
The whole process was super easy, and I hope you give it a try.
In this post, I document my simple process.
For this project I used:
• Soy wax flakes
• Candle wick(s)
• Various sizes of Mason Jar or other up-cycled jar like a cute jelly jar.
• Crayons for color + Various Spices for added scent (optional)
These items are easy to find at your hobby/craft store, but if you can’t find them there, there’s always Amazon.
* Disclaimer * I am an Amazon Associate. The above links are Amazon affiliate links. If you use them, I earn from qualifying purchases a commission of the sale at no additional cost to you.
5 Easy Steps
1.
Measure out the amount of soy wax by filling up the jar and gently compressing wax flakes down to ensure the desired amount after the wax has been melted.2.
Place measured amount of was into the microwaveable container that comes with the kit. If you want to add color to the candle, add a crayon of choice. Break it up into small pieces and add it to the wax flakes.Melt the soy candle wax flakes and broken a crayon (or two) in the microwave by following the directions included in the box.
3.
While the wax is melting, position the wick in the center of the jar. I added a small amount of glue from a glue stick to keep it secured to the bottom.
Keep the wick centered in the wax while the wax cools and sets.
4.
After wax and crayon melt entirely, gently stir to incorporate crayon's color and wax, then carefully add any spices for desired sent.5.
Carefully pour the wax mixture into a prepared jar with the wick.Keep the wick centered by using a pencil, skewer, or other stick to help center the wick while the wax is setting.
![Clip-art download available at [Watercolor Autumn Clip Art]](https://images.squarespace-cdn.com/content/v1/57acfd23cd0f687fdc5e0fe5/1573591845234-NG1OYHMSTL3IC4OL76SI/Autumn-Leaf-Spring-by-Olive-Blossom-Desings.png)
Clip-art download available at [Watercolor Autumn Clip Art]

Supplies
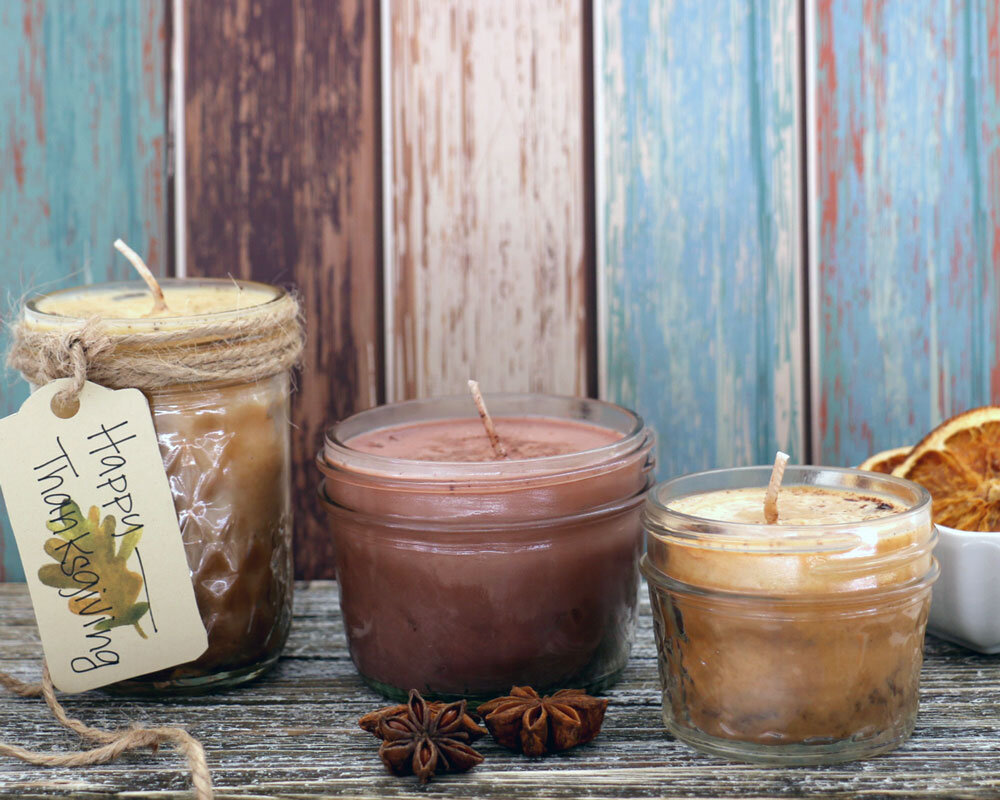
Completed project! 😃
Gift Tags 🏷️

Last year I created some watercolor leaf clip art and decided to create gift tags.
I printed some leaf clip-art on a card stock sheet and then cut them out into tags.
Go to the Watercolor Autumn Clip-Art post to download these little leaves and the gift tag template.


